Dashboards
OSM Pro dashboard module give summarized views into sections of OSM Pro. There are currently two dashboards available to users, with appropriate permission levels. The first dashboard is the Dispatch Dashboard. The dispatch dashboard allows dispatchers to quickly assign loads to trucks, view status information, and make any updates or changes to loads. The second dashboard is the Order Validation Dashboard. The order validation dashboard allows the user a quick view of all completed loads by truck. From this dashboard the user is able to make modifications to the completed loads before the billing cycle.
Dispatch Dashboard
The dispatch dashboard is broken out into three sections. The first section Pending Orders is found on the left hand panel. The pending orders grid will provide the following information about the loads.

Command Buttons
The second part of the dispatch dashboard is the Trucks grid. This grid is located on the upper right hand side of the dispatch dashboard. The trucks grid shows all trucks that are configured in OSM Pro. The truck grid also show information about the truck.
Command Buttons
The final part of the dispatch dashboard is the Truck Order grid. This grid is located on the lower right side of the screen just below the Trucks grid. The truck order grid shows all assigned and active loads for a truck selected in the Trucks grid. Orders in the truck order grid show the following information.
Command Buttons
Assigning Loads
Using the dispatch dashboard dispatchers can easily assign loads to available trucks. To assign a load the dispatcher will first select the truck they wish to assign a load to from the Truck grid. Next they will click on the assign load button ![]() next to the load in the Pending Orders grid.
next to the load in the Pending Orders grid.
The load will be removed from the Pending Orders grid and placed on the bottom of the queue on the Truck Order grid. If a load is combined with additional loads, all combined loads will be assigned to the truck as well. Combined orders are assigned based on the customer job number.
Changing Origin Address
The origin address can be changed for both, pending orders in the Pending Orders grid, and for assigned orders on the Truck Order grid. To change the origin address select at least one load to update using the check box column before the load. If you are changing the origin address for a Pending Orders grid select Change Origin under the Pending Job Functions. If you are changing origin address for a load in the Truck Order grid select Change Origin under the Assigned Job Functions. This will bring up a screen with all addresses for the load’s customer. Select the address you wish to replace the current origin address with and press the Select button. If you decide you do not want to change the origin address click the Cancel button.
Changing Destination Address
The destination address can be changed for both, pending orders in the Pending Orders grid, and for assigned orders on the Truck Order grid. To change the destination address select at least one load to update using the check box column before the load. If you are changing the destination address for a Pending Orders grid select Change Destination under the Pending Job Functions. If you are changing destination address for a load in the Truck Order grid select Change Destination under the Assigned Job Functions. This will bring up a screen with all addresses for the load’s customer. Select the address you wish to replace the current destination address with and press the Select button. If you decide you do not want to change the destination address click the Cancel button.
Combining Loads
Load can be combined for both, pending orders in the Pending Orders grid, and for assigned orders on the Truck Order grid. To combine loads select at least 2 orders to combine by using the check box column before the load. If you are combining loads for Pending Orders grid select Combine Orders under the Pending Job Functions. If you are combining loads for loads in the Truck Order grid select Combine Orders under the Assigned Job Functions.
Splitting Loads
Load can be split for both, pending orders in the Pending Orders grid, and for assigned orders on the Truck Order grid. To split loads select at least one order that is combined by using the check box column before the load. If you are splitting loads for Pending Orders grid select Split Orders under the Pending Job Functions. If you are splitting loads for loads in the Truck Order grid select Split Orders under the Assigned Job Functions.
Completing Loads
Depending on the business process of your organization. Users can choose to force complete a load. This will push the load to billing even though required billing fields may or may not be present. These fields will be able to be populated at a later time in the billing modules of OSM Pro. The primary use of this feature is for organizations who do not wish to utilize the dispatch capabilities of OSM Pro.
User can force complete loads from the Pending Orders grid by selecting the orders they wish to complete by clicking on the check box column before the load. Once they have all the loads they wish to complete they can select Complete Jobs from the Pending Job Functions. This will remove the order from the Pending Orders grid and force it to a complete status and ready for billing department. Users can also force complete loads from the Truck Orders grid by selecting the orders they wish to complete by clicking on the check box column before the load. Once they have all the loads they wish to complete they can select Complete Jobs from the Assigned Job Functions. This will remove the order from the Truck Order grid and force it to a complete status and ready for billing department.
Uploading Documents
OSM Pro allows uploading a single document to multiple jobs. This can be used to attach a BOL to one or more jobs at a single time. Documents can be attached to orders in the Pending Orders grid by first selecting the orders to upload documents to by clicking the check boxes in front of the load and selecting Upload Documents in the Pending Job Functions. Documents can also be attached to orders in the Truck Order grid by selecting the check boxes in front of the loads and selecting Upload Documents from the Assigned Job Functions. This will open the document upload form. Select the document you wish to upload by clicking on the browse button and navigating to the file. Next select the type of document. Once you are ready to upload the document click the Upload button. If you do not wish to upload a document click the Cancel button.
Transfer Hubs
Orders can be transferred between hubs setup in OSM Pro. Orders can only be transferred from the Pending Order grid. To transfer orders to a different hub select the orders you wish to transfer by clicking on the check box column in front of the load. Next click Transfer To Hub from the Pending Job Functions. This will bring up the transfer form. Select the hub you wish to transfer orders to and click the Transfer button. If you do not want to transfer order click the Cancel button.
Fleet Options
The Fleet Options button allows the user to see all trucks configured in the system, or hide the inactive truck in the Truck grid. To hide inactive trucks make sure the On column is not checked for the truck in the Truck grid, and unselect View All Trucks from the Fleet Options button.
Hub View
The Hub View button allows the user to filter what loads they are currently working with. If a user has access to multiple hubs they can view specific hub information by selecting which hub they wish to view.
Order Validation Dashboard
The Order Validation Dashboard is an option step depending on your business process. The purpose of the dashboard is to show all loads completed by truck. The dashboard gives you the ability to make modification to completed loads before billing. The Order Validation Dashboard is broken down into 2 sections. The first section is the Trucks grid which is located on the left hand side of the dashboard. The Trucks grid provides you the following information.
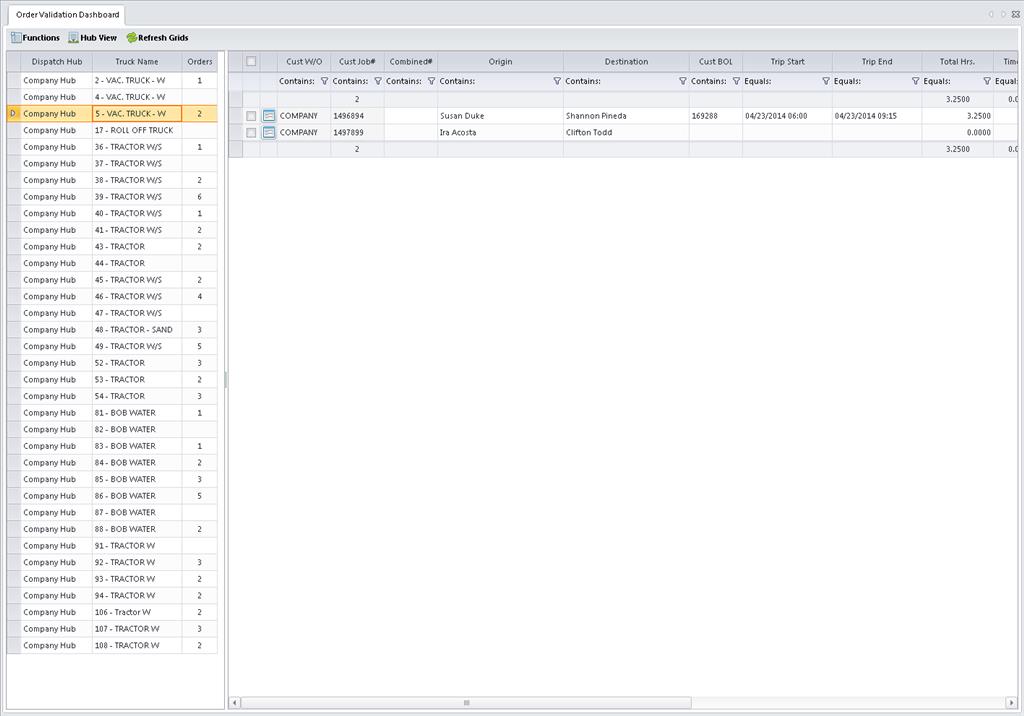
The second section of the Order Validation Dashboard is the Truck Order grid. This grid is located on the lower right side of the screen just below the Trucks grid. The truck order grid shows all assigned and active loads for a truck selected in the Trucks grid. Orders in the truck order grid show the following information.
Verify Loads
Once loads for a truck have been verified the user can check the check box column of the order in the Truck Order grid and select Verify from the Functions menu. This will remove the load from the Order Validation Dashboard and mark it as verified in the Completed Orders screen.
Changing Origin Address
The origin address can be changed for orders in the Truck Orders grid. To change the origin address select at least one load to update using the check box column before the load. Once all the loads are selected click the Change Origin option in the Functions menu. This will bring up a screen with all addresses for the load’s customer. Select the address you wish to replace the current origin address with and press the Select button. If you decide you do not want to change the origin address click the Cancel button.
Changing Destination Address
The destination address can be changed for orders in the Truck Orders grid. To change the destination address select at least one load to update using the check box column before the load. Once all the loads are selected click the Change Destination option in the Functions menu. This will bring up a screen with all addresses for the load’s customer. Select the address you wish to replace the current destination address with and press the Select button. If you decide you do not want to change the destination address click the Cancel button.
Combining Loads
Loads can be combined by selecting loads on the Truck Orders grid. To combine loads, select at least 2 loads you want to combine by selecting the check box column in front of the loads. Next select the Combine Order option in the Functions menu.
Splitting Loads
Loads can be split by selecting loads on the Truck Orders grid. To split loads, select at least 1 load that you want to combine by selecting the check box column in front of the loads. Next select the Split Order option in the Functions menu.
Rolling Back Loads
Orders can be rolled back to pending. This feature is available in case a load was forced complete without the required billing information by accident. Rolling back loads will reset their status to pending. To roll back loads select the loads you wish to roll back by selecting the check box column in front of the load. Next select Rollback To Pending from the Functions menu.
Uploading Documents
OSM Pro allows uploading a single document to multiple jobs. This can be used to attach a BOL to one or more jobs at a single time. To attach documents select the loads you wish to upload documents to by selecting the check box column in front of the order. Next select Upload Document from the Functions menu. This will open the document upload form. Select the document you wish to upload by clicking on the browse button and navigating to the file. Next select the type of document. Once you are ready to upload the document click the Upload button. If you do not wish to upload a document click the Cancel button.
Cancel Orders
To cancel orders that were pushed to the Order Validation Dashboard select the orders by clicking on the check box in front of the load. Next select the Cancel option from the Functions menu. This will move the order from a completed status to a cancelled status. The order will only be available on the Cancelled Orders screen in the Jobs / Work Orders module.
Hub View
The Hub View button allows the user to filter what loads they are currently working with. If a user has access to multiple hubs they can view specific hub information by selecting which hub they wish to view.
SWN Digital BOL
The SWN Digital BOL dashboard provides SWN carriers the authorized export of digital BOL and verification data required by South Western Energy (SWN) for order verification before invoicing. The SWN Digital BOL dashboard will load orders that have a status of Ready To Invoice for a given date range.
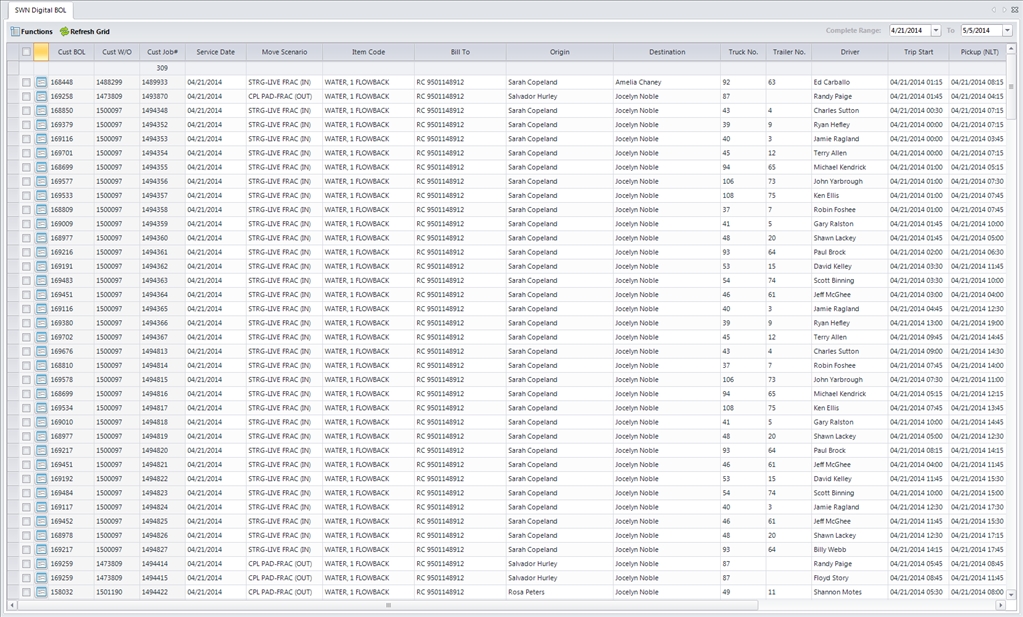
The dash board provides two forms of export under the Functions menu. The first export is a data only export. The data only export is activated by clicking the Export Data Only option under the Functions menu. This export will generate a .csv file containing the selected loads. The second export is a detailed export. This export will generate a digital bol for the selected loads. It will also include a bol listing report which contains all loads on digital bols, and a .csv file containing the selected loads. To run the detail export select Export Details under the Functions menu.
Both export options will send a batch job to the OSM Pro servers and the user will be notified when the batch has been completed by e-mail. The e-mail will contain summary information about the batch job and provide a download link for the batch job. Batch files will only be available for 7 days after generation. After 7 days the batch will be flagged for removal from the OSM Pro servers.
If you would like to have this file automatically send to a SWN representative, you can setup an e-mail address on the customer record using the field Digital BOL Copy. This will allow the user running the export to receive the response when the batch is complete, but will also send a copy of the export complete e-mail to the e-mail address entered into Digital BOL Copy field.