Administration
Management
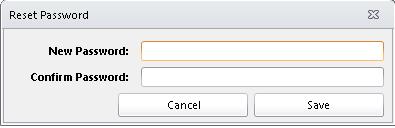
Reset Password
The reset password section will allow the current user to change their password. This is mainly used during the account creation phase as passwords are randomly generated for users. When the user clicks on the reset password option a window will appear asking them for a new password, and to confirm the new password. OSM Pro passwords must be at least 6 characters long and contain at least 1 numerical character.
Example: password1
Organization
The organization management screen brings up information about your organization. This screen is only used during the setup of your organization in OSM Pro. If contact changes for your organization need to be made you can do so here. When you are done with making changes to your organization information click the Save Settings button.

Dispatch Hubs
Dispatch hubs gives your organization a way to segregate data. Hubs can be either a physical or virtual location. Hubs also add an extra layer of data security. For example if you have multiple locations dispatchers from location A wouldn’t see loads for location B. Although the loads are segregated by physical hubs, they are joined back in a centralized accounts receivable module. Hubs can also be a virtual location. For example if your organization only has one location, but some dispatchers only deal with certain job types while other dispatchers work with other job types. This way the jobs can be assigned to the virtual locations and each dispatch group would only see loads that pertain to them. Combination of physical and virtual hubs will add greater control on data flow throughout your organization. Users are assigned to hubs on the User Security screen.
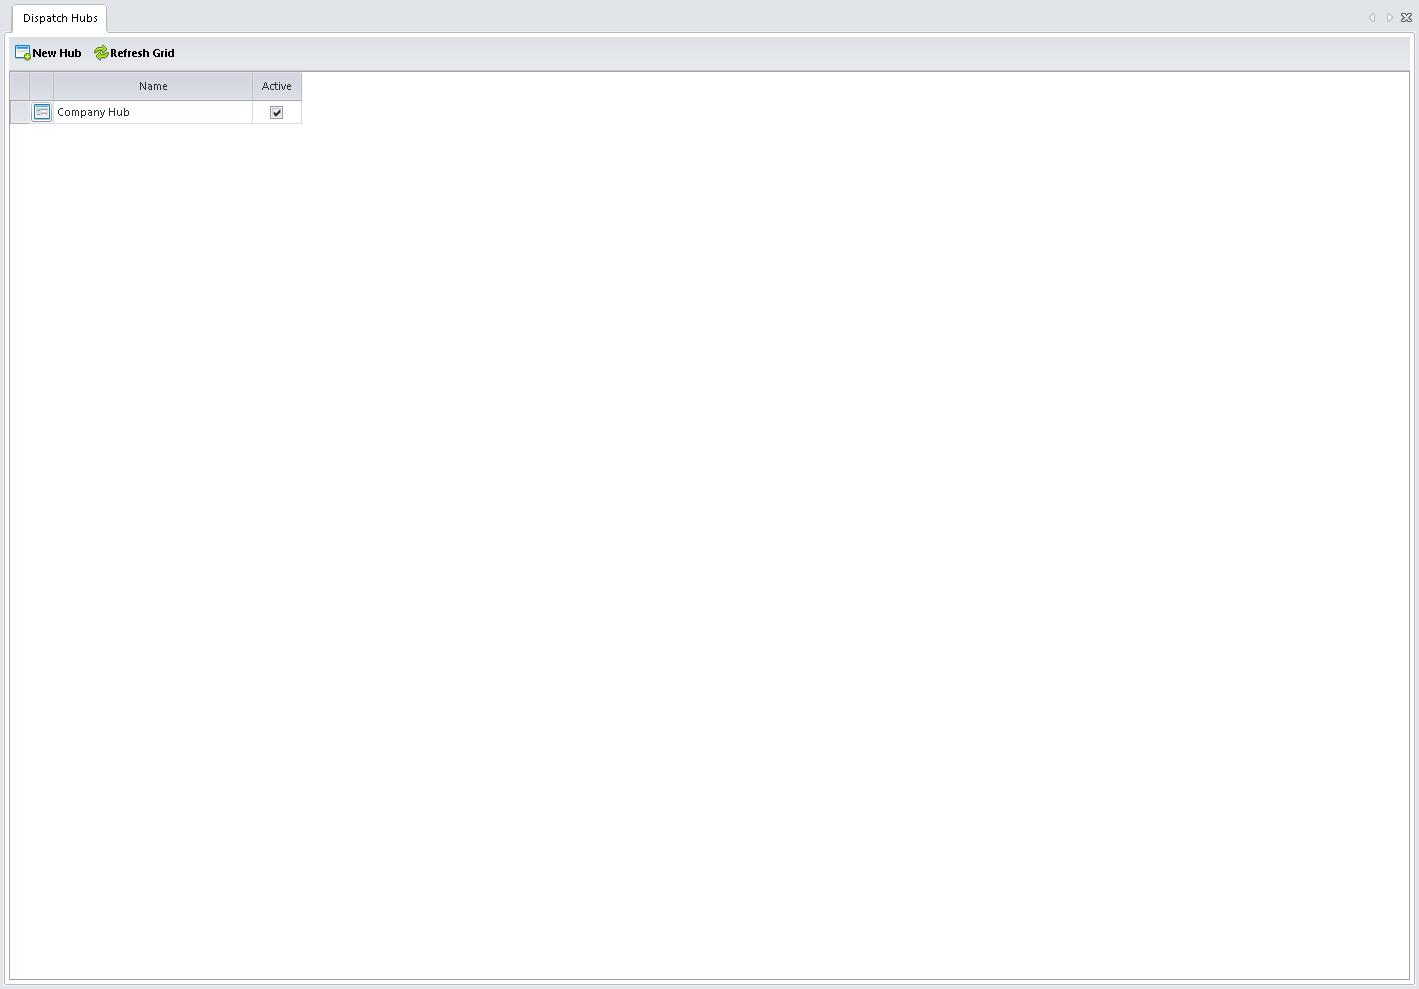
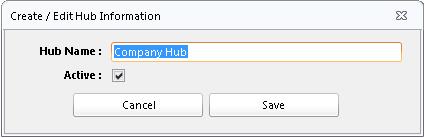
There is only one way in OSM Pro to create hubs. To create a new hub, either physical or virtual, click on the New Hub button. This will bring up the Hub Maintenance screen. From here the user will enter a name for the hub and select if the hub is active. If a hub is not active it will not show up in any screens that allow for hub selection.
To view or update information about a hub click on the ![]() button. This will bring up the Hub Maintenance screen.
button. This will bring up the Hub Maintenance screen.
Security
User Accounts
User accounts allow you to select who in your organization can log into the OSM Pro system. It also allows for the control of what they can do in the system, based on user permissions, and what data they can see, based on dispatch hubs.

User accounts can be created two different ways. The first way is to click on the New User Account button. This will load the Account Editor screen. For a new user account you will need to enter the username. The username must be a valid e-mail address. The user’s first name and last name. To finish creating the employee record click the Save button. Once the user account is created the user will receive a randomly generated password via the e-mail address that was entered in for their username.
The second way to create employees is through the import document located at http://www.osmpro.com/setup.html. Once the document has been completed please e-mail the completed packet to support@trinetica.com.
To view or update information about a user account click on the ![]() button. This will bring up the Account Editor.
button. This will bring up the Account Editor.
User Permissions
OSM Pro user permissions allows you to turn on or off sections and features of OSM Pro on a user by user basis. The set the permissions for a user click on the button on the user account screen. This will load the user permission editor. The Navigation permissions are a laid out to mirror the module menu on the left hand side of the screen. If a user needs access to a certain screen you can navigate through the Navigation permissions and check the check box in front of the screen name making it available to the user. If you do not want to have a screen available to a user uncheck or leave the check box blank for that screen. The Pages permissions contains permissions for a given page. For example a user may have access to Pending Jobs, but does not have permission to Cancel Loads. To set a page permission navigate to the page you need to set the permission and click the check box in front of the permission you wish to activate.

You can also copy permissions from one account to another by clicking the Copy From button at the bottom of the screen. This will bring up a window where you can select a user account to copy permissions from. Once you have selected the account you wish to copy from, the permission screen will automatically set all the permissions from the parent account to the current account.