Accounts Recevable
Customers
Customer Accounts
Customer accounts in OSM Pro in combination with job types will drive how the system handles your business processes. Through the Customer Editor you will be able to setup automatic job rates, using the Rate Editor, and misc. charges, using the Misc. Charge Editor, to be applied to loads.
The customer account screen will display a list of all customers that have been configured in the OSM Pro system.
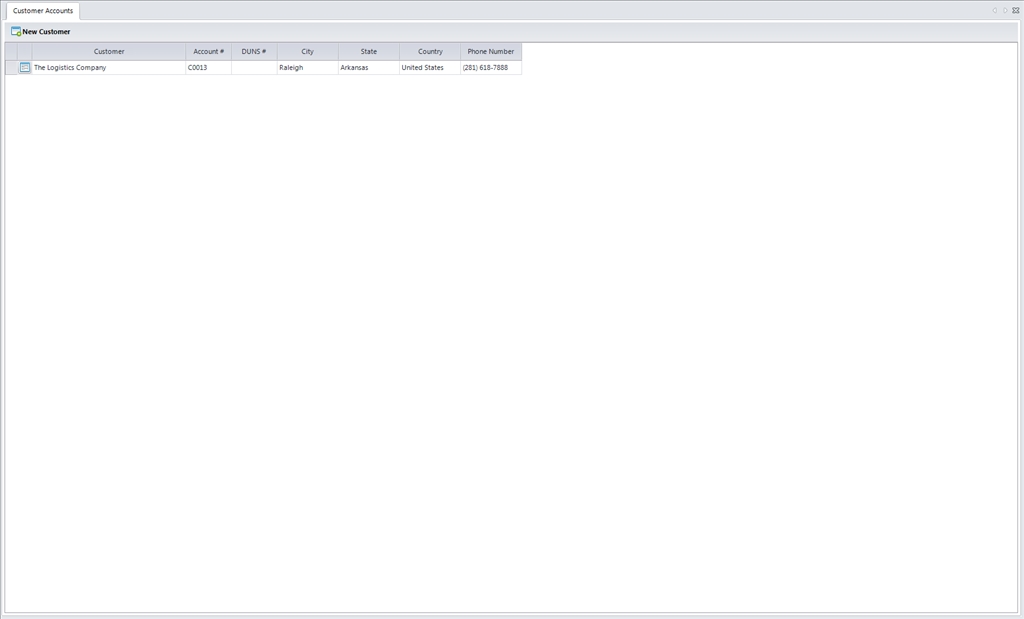
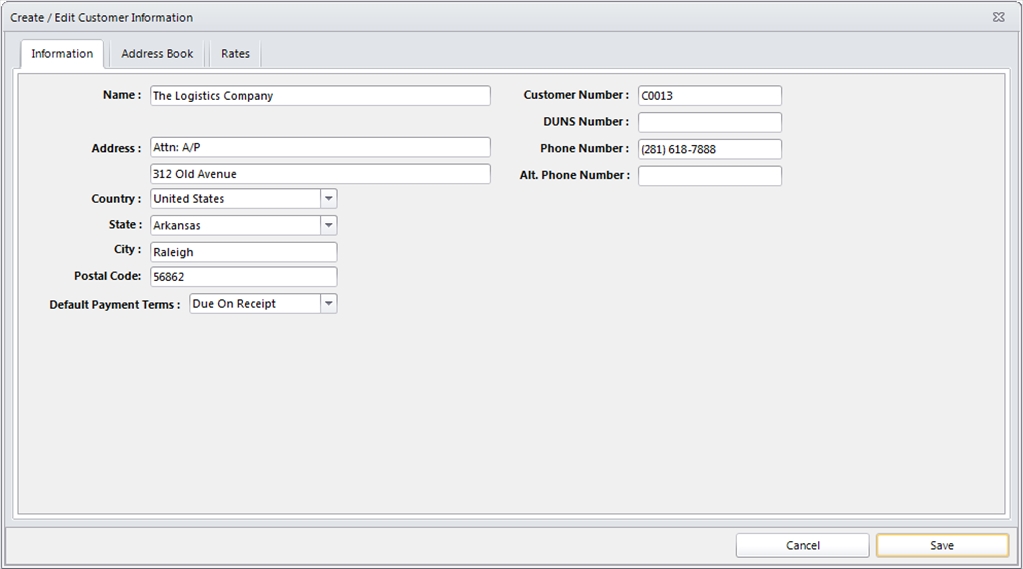
To create a new customer account in OSM Pro click on the New Customer button. This will launch the Customer Editor. When creating a new customer only the Information tab is available. Once a customer has been created, you can click on the ![]() button and access the Address Book and Rates tabs. On the Information tab you will need to enter the customer name, duns number, address information, and phone number are required. Optional fields like Customer Account can be used to track customers in different systems. You can set a default payment term for the customer as well. This payment term will be used on invoices. To save the new customer record click the Save button. If you do not want to save the customer click the Cancel button.
button and access the Address Book and Rates tabs. On the Information tab you will need to enter the customer name, duns number, address information, and phone number are required. Optional fields like Customer Account can be used to track customers in different systems. You can set a default payment term for the customer as well. This payment term will be used on invoices. To save the new customer record click the Save button. If you do not want to save the customer click the Cancel button.
To view or update a customer click on the ![]() button. This will bring up the Customer Editor.
button. This will bring up the Customer Editor.
The Address Book on the Customer Editor contains all the well locations for this customer. The address book contains both origin and destination addresses. These address can be created 2 ways. The first way is by clicking the Add Address button. This will bring up the Well Address Editor. First enter the name of the well or location. Next enter the geo coordinates of the well or location. Finally, select the country, state, county, and enter city of the well or location. If the location requires sales tax to be used click on the use tax check box. To save the address click on the Save button. If you do not want to save the address click the Cancel button.
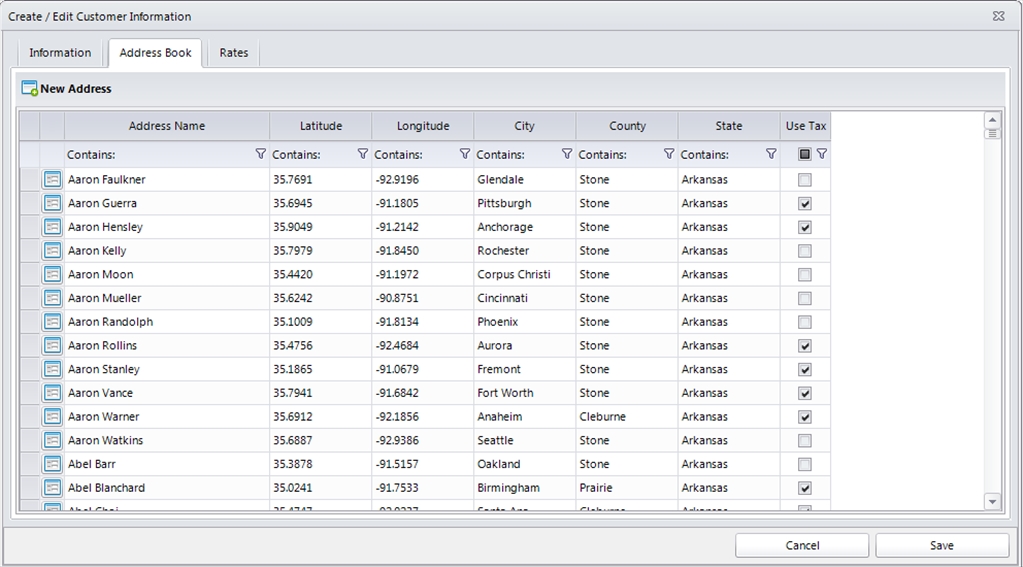
The second way to create addresses is through the load import service. If your organization is setup for load imports, OSM Pro will create addresses that do not exist in the system. Automatically created addresses will no set the use tax field. If an automatically created address needs to use sales tax, the address record can be updated by clicking the ![]() button and setting the use tax check box.
button and setting the use tax check box.
The Rates tab allows you to setup the rates applied to a job type, and any misc. charges associated with the job type on a customer by customer basis.
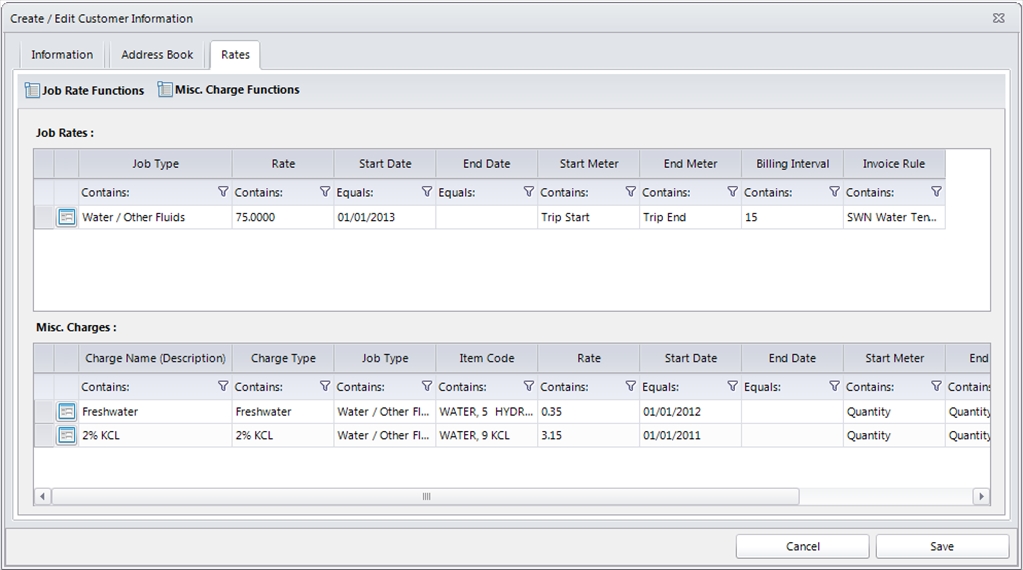
To add a new rate for a customer click on the New Job Rate option under the Job Rate Functions. This will load the Job Rate Editor. First the user will enter in the price for this rate. Rates can be up to 4 decimal places. Next the user will select the active date for this rate. If the rate is to be used immediately then set the active date to the current date. The end date is optional for rate setup. If there is no end date for the rate then leave this value empty. Once an end date is set the rate will no longer be allied to loads when the current date exceeds the end date. Next the user will select the job type this rate is to apply to for the customer. The next two fields, start meter and end meter, are used to determine the quantity to be billed. If your organization is billing on quantity then the start and end meter need to both be quantity. If you are billing on hourly then your start and end meters will be the start and end timestamp to calculate quantity of hours to bill. If your organization rounds time to the nearest nth minute, for example billing in 15 minute intervals, then the user will enter the interval used for rounding time. If you are using hourly billing and do not use a timed interval leave this field blank or enter 1. If you are using quantity or mileage for billing the billing interval is not used. Finally the user will select the invoice rule. The invoice rule contains all the business logic for grouping and invoice layout. For more information about invoice rules refer to the Invoice Rule section of the manual.
To view or update a job rate click on the ![]() button. This will bring up the Job Rate Editor.
button. This will bring up the Job Rate Editor.
To assign a misc. charge rate to a customer for a job type click on the New Misc. Charge option in the Misc. Charge Functions menu. This will load the Misc. Charge Editor. First the user will enter a name for the misc. charge. Next the user will select the type of misc. charge. Misc. charge types are used for reporting features and the ability to map misc. charges to accounts in external accounting systems. Next the user will enter the rate for the misc. charge. Next the user will select the active date for this misc. charge. If the misc. charge is to be used immediately then set the active date to the current date. The end date is optional for misc. charge setup. If there is no end date for the misc. charge then leave this value empty. Once an end date is set the misc. charge will no longer be allied to loads when the current date exceeds the end date. The next field is job type. If your organization only wants this misc. charge for the customer to be applied to a specific job type then select the job type this misc. charge is for. If this misc. charge is applied to all job types then leave the job type field blank. If your organization only wants this misc. charge for the customer to be applied to a specific item code then select the item code for the misc. charge. If this misc. charge is to be applied regardless of item code then leave this field blank. If you want this misc. charge to be automatically applied to loads for this customer that match the job type and item code rules click on the auto apply. If you wish to auto apply misc. charges you have to select the trigger in which the misc. charge will be applied. The next two fields, start meter and end meter, are used to determine the quantity to be billed. If your organization is billing on quantity then the start and end meter need to both be quantity. If you are billing on hourly then your start and end meters will be the start and end timestamp to calculate quantity of hours to bill.
To view or update a misc. charge rate click on the ![]() button. This will bring up the Misc. Charge Rate Editor.
button. This will bring up the Misc. Charge Rate Editor.
Invoicing
Ready To Invoice
The Ready To Invoice screen in OSM Pro shows the user all of the loads that are complete and ready to be assigned to an invoice. To select jobs that are ready to invoice you will need to enter the date range the loads were started on. This is also your billing range. Once the date range is entered click on the Refresh Grid button. This will load all jobs ready to invoice for the billing range. All loads on the ready to invoice screen should be free from dispatch errors, as they loads cannot be pushed from dispatch to accounting with errors that would affect the invoicing process. Loads can be pushed from dispatch to accounting that may contain warnings. The warnings are color coded and will show in the footer of the grid. Warnings will not affect the invoice process, but may give undesired invoice results if left unattended. The following warnings are available on the ready to invoice screen.
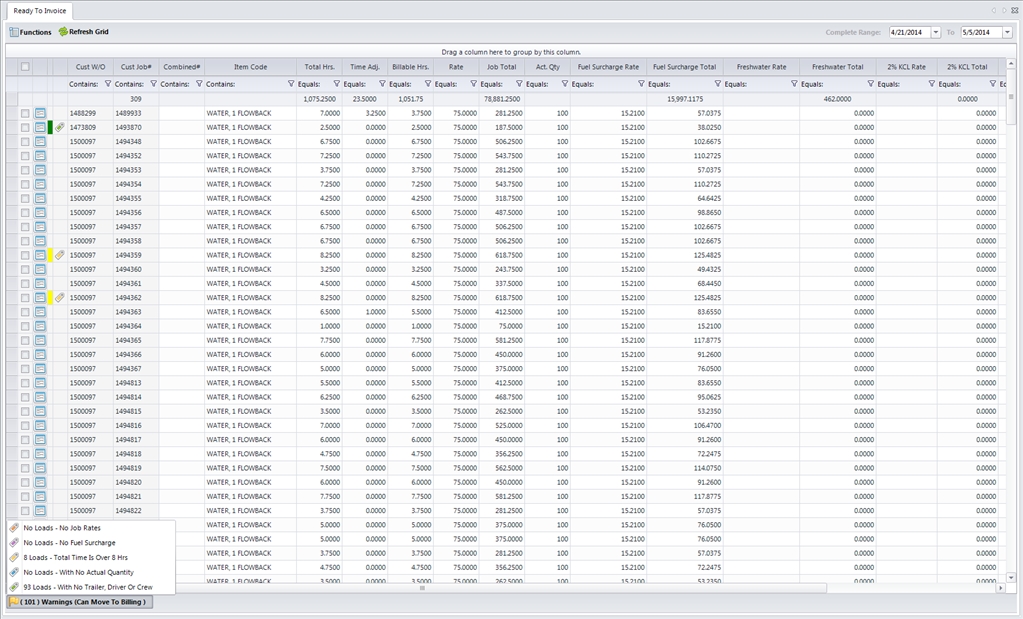
Warning Messages
When the user is ready to generate invoices, they will select the loads to be invoiced by clicking on the check box in front of each load. If they wish to invoice all loads they can click on the check box in the header of the grid. Once loads are selected the user will then select Invoice from the Functions menu. This will send all loads to be invoiced based on the invoice rules selected based on the customer and job type combination. For details about invoice rules please refer to the Invoice Rules section of the manual. Once the invoices have been created the user will be given a message that states the invoices have been created and will give them the invoice range that was generated. With the invoice range the user can complete the Push To ADP and Export Invoices functions. When the server has completed generating the invoice packet based on invoice rules the user will receive an e-mail containing a link to download the invoice packet. Invoice packets will remain on the server for 7 days.
If a load is on the ready to invoice screen that should not be invoiced or is not ready the user can select the load by clicking the check box in front of the load and select the Rollback option under the Functions menu. This will roll back the status of the load from ready to invoice to complete and will make the load visible to the Completed Orders screen.
Open Invoices
The Open Invoice screen shows the users all open invoices by invoice date. To load open invoices the user must enter a date range for the invoiced dated. Once the user enters the date they need to click the Refresh Grid button to load invoices.
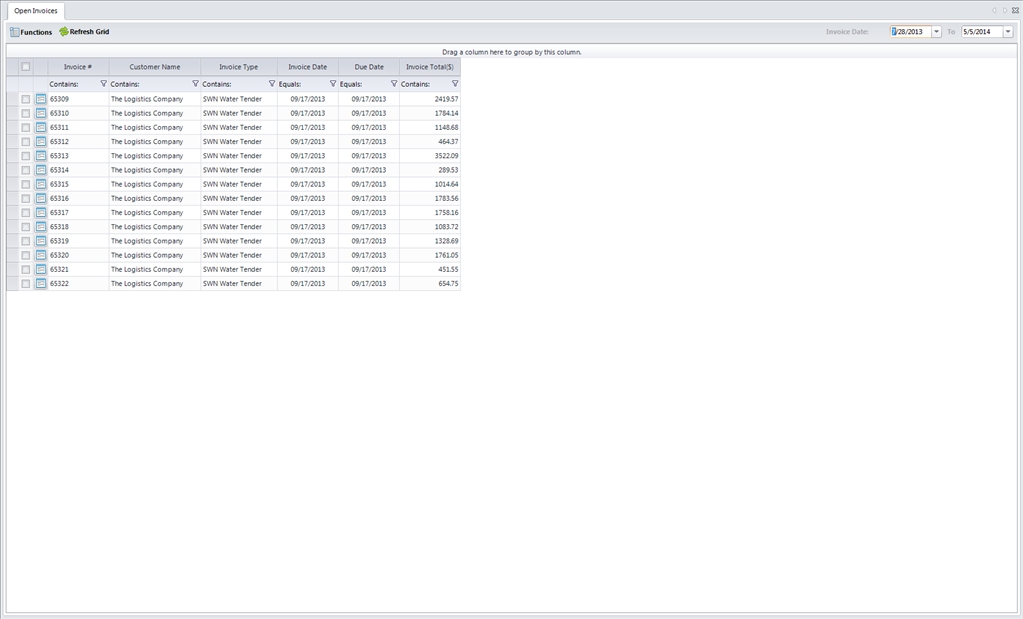
If the user needs to add a load to an invoice, the invoice must first be undone. To do this the user will select the invoice to redo by clicking the check box in front of the invoice and select the Rollback option from the Functions menu. This will undo the invoice and move all loads on the invoice back to Ready To Invoice, so that the invoice can be recreated. Please note that if your organization utilizes ADP or Quick Books features in OSM Pro, the external systems will need to be modified manually to reflect the changes.
If the user needs to update values for an invoice, for example adding sales tax or updating a misc. charge, the user will select the invoice by clicking the check box in front of the invoice and select Regenerate Invoice from the Functions menu. This will recalculate the invoice values. Once the invoice regeneration is complete the user will receive an e-mail containing a new invoice packet for regenerated invoices. Regenerated invoice packets will remain on the server for 7 days. Please note that if your organization utilizes ADP or Quick Books features in OSM Pro, the external systems will need to be modified manually to reflect the changes.
If you are using external tools to handle the payment process for invoices you can close invoices out once they are generated. To manually close invoices select the invoice you wish to close by clicking the check box in front of the invoice. If you want to close all invoices click on the check box in the header of the grid to select all records. Once invoices have been selected click on the Close Invoice option in the Functions menu.
Closed Invoices
The closed invoices section of OSM Pro allows the user to view invoices with a closed status by invoice date range. The user must first enter an invoice date range and click the Refresh Grid button. This will load all closed invoices for the date range.
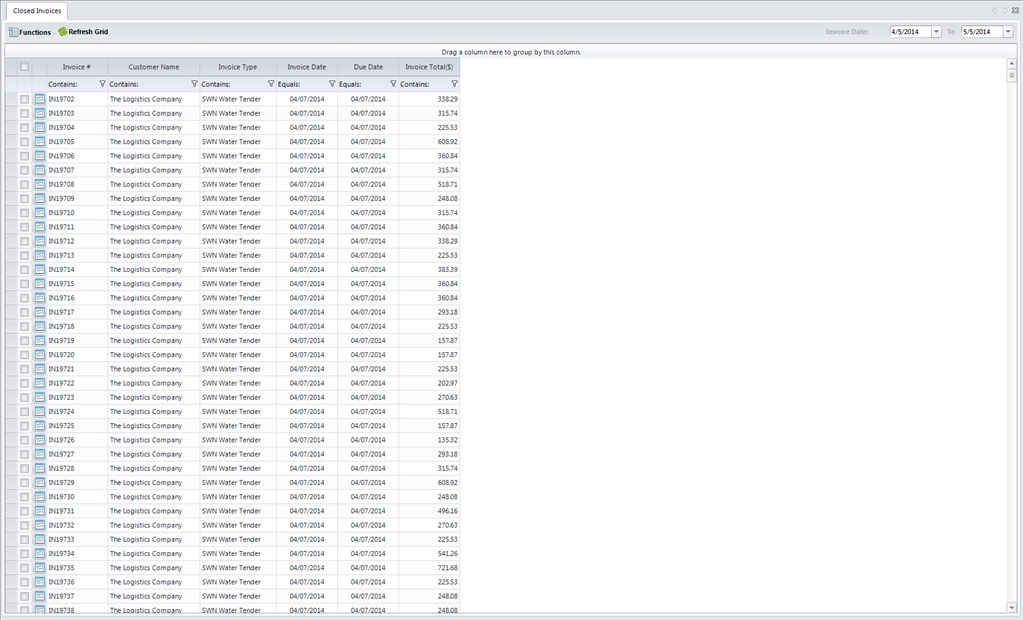
If the user needs to add a load to an invoice, the invoice must first be undone. To do this the user will select the invoice to redo by clicking the check box in front of the invoice and select the Rollback option from the Functions menu. This will undo the invoice and move all loads on the invoice back to Ready To Invoice, so that the invoice can be recreated. Please note that if your organization utilizes ADP or Quick Books features in OSM Pro, the external systems will need to be modified manually to reflect the changes.
If the user needs to update values for an invoice, for example adding sales tax or updating a misc. charge, the user will select the invoice by clicking the check box in front of the invoice and select Regenerate Invoice from the Functions menu. This will recalculate the invoice values. Once the invoice regeneration is complete the user will receive an e-mail containing a new invoice packet for regenerated invoices. Regenerated invoice packets will remain on the server for 7 days. Please note that if your organization utilizes ADP or Quick Books features in OSM Pro, the external systems will need to be modified manually to reflect the changes. Invoices that are regenerated will remain in the closed state.
ADP Open Invoice
Push To ADP
The Push To ADP feature allows the user to select a group of invoices and generate green sheets and documents needed to upload to ADP. Additional ADP integration is currently under development. When the Push To ADP is opened the user will need to select a range of invoices to export. Once the user enters the range of invoice number they click the Refresh Grid button. This will then load the invoices into the grid. The user can then select which invoices they wish to export by clicking on the check box in front of the invoice. If they wish to export the entire grid, the user can click the check box in the header of the grid selecting all records.
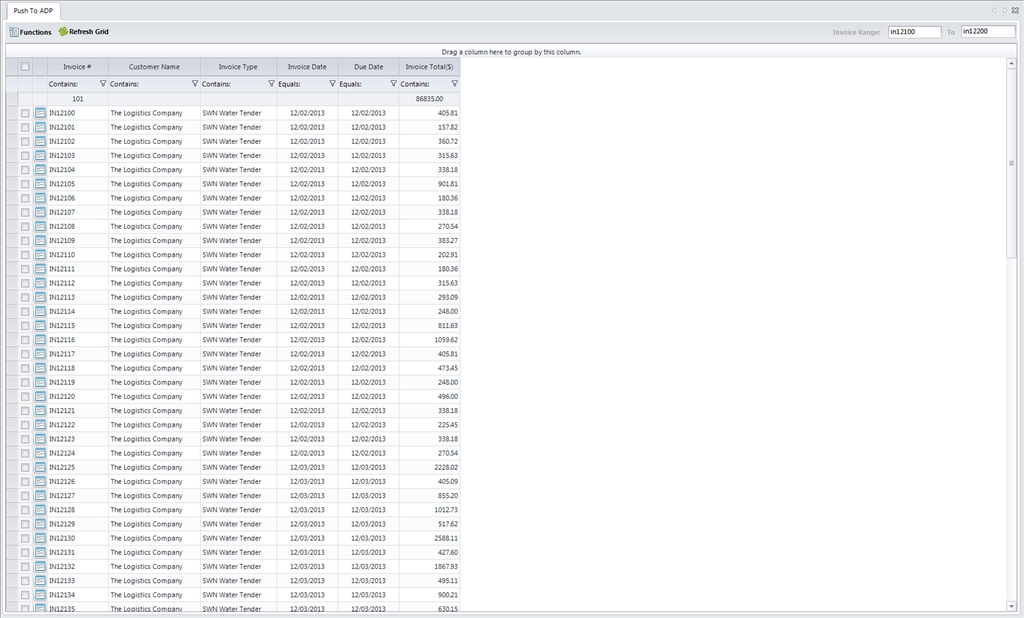
Once invoices are selected the user will select SWN Generate Green Sheet from the Functions menu. Currently the Push To ADP is only configured for South Western Energy green sheets. Further development is in process for ADP Open Invoice LIDO Services, and ADP Open Invoice RNIF Services.
QuickBooks
OSM Pro is fully integrated with QuickBooks accounts receivable functions. If you are using QuickBooks for your A/R needs you will need to sync OSM Pro with your QuickBooks company file. Once the two programs are synchronized, you will be able to map customers, rates, misc. charges, and tax codes to your QuickBooks accounts. After all the mapping is complete you will be able to push invoices from OSM Pro to QuickBooks through the Export Invoice feature.
Link Company File
For the OSM Pro to Quick Books integration to work you must first sync OSM Pro to your Quick Books company file. This only needs to be done once and can be access from the Accounts Receivable, Accounts Payable (coming soon), and Human Resource modules. You do not need to link company file per module. The Link Company File will launch an on screen wizard to walk you through linking OSM Pro to Quick Books. Once your company file is linked you will be able to perform all the syncing and export features in OSM Pro.
Sync Customers
Syncing Quick Books customers with OSM customer accounts is required for the OSM Pro to Quick Books A/R integration. The first column of the grid will list all customers currently configured in OSM Pro. The second column allows you to select the customer account from Quick Books that is the same as the OSM Pro customer. Once you have selected the Quick Books customer for the customer account you want to sync click on the Save Mapping button.

Sync Rates
Syncing Quick Books accounts with OSM customer rates is required for the OSM Pro to Quick Books A/R integration. The first column of the grid will list all customers currently configured in OSM Pro. The second column will list the job type setup for this customer. If a customer is configured for more than one job type there will be a record for each job type. The third column allows you to select the account from Quick Books that you can map the customer, job type combination to. Once you have selected the Quick Books accounts for the customer job type combination you want to sync click on the Save Mapping button.

Sync Misc. Charges
Syncing Quick Books accounts with OSM misc. charge groups is optional. If you do not sync accounts loads with misc. charges will not export the misc. charge. The load will still be exported with the invoice. The first column list all the misc. charge types in OSM Pro. The second column allows the user to select an account in Quick Books to map the misc. charge type to. Once you have selected the Quick Books accounts for misc. charges you want to sync click on the Save Mapping button.

Sync Sales Tax
Syncing Quick Books tax accounts with OSM tax codes is optional. The grid will only show active OSM Pro tax codes. For more on tax codes please read about Tax Codes in the accounts receivable Settings section. If you do not sync accounts loads with sales tax will not export the sales tax. The load will still be exported with the invoice. The first column list the state for the tax code. The second field is the county for the tax code. The third column is the tax code name configured in OSM Pro. The fourth column is the Quick Books account for tax codes. The final column is the Quick Books tax code group. Both the fourth and fifth columns must be selected to sync tax code from OSM Pro to Quick Books. Once you have selected the tax account and tax group for each tax code you want to sync click on the Save Mapping button.
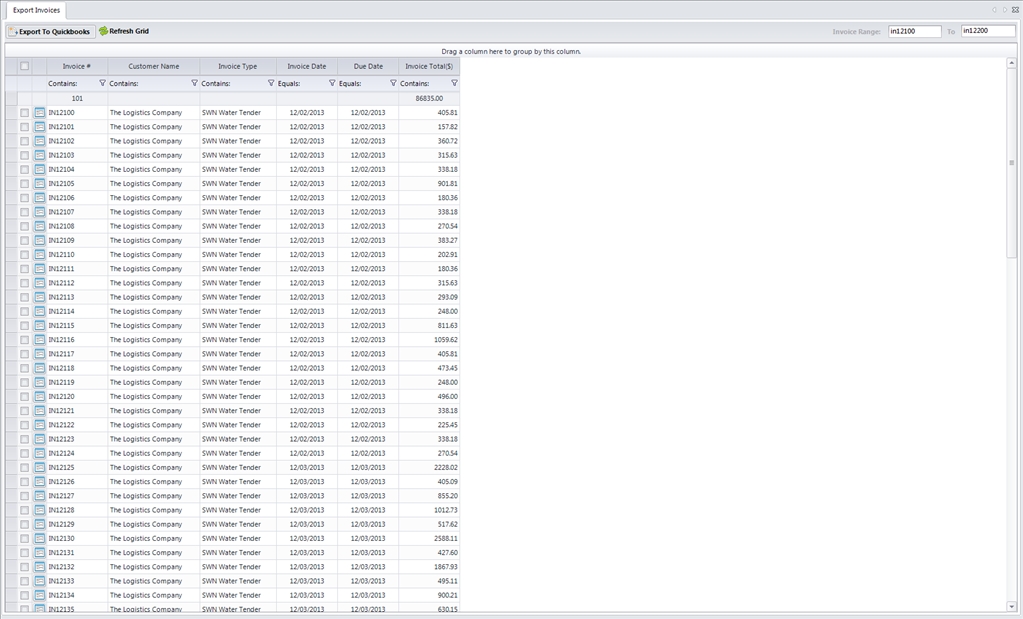
Export Invoices
To export invoices to Quick Books you will first need to enter the range of invoices to load. The invoice range is presented to the user after the invoices have been created from the Ready To Invoice screen. Once you have entered the invoice click on the Refresh Grid button and the invoices will appear in the grid. Next select the invoices you wish to export to Quick Books by selecting the check box in front of each invoice. If you wish to export the entire range click on the check box in the grid header and all the check boxes will be checked. Once you are ready to export invoices click on the Export To Quick Books button. This will start the process of exporting invoices.
Settings
Payment Terms
The Payment Terms screen allows you to view and configure the A/R payment terms for your organization. Payment terms are required for the Accounts Receivable module to generate invoices. If no payment terms are configured, invoices will not generate.
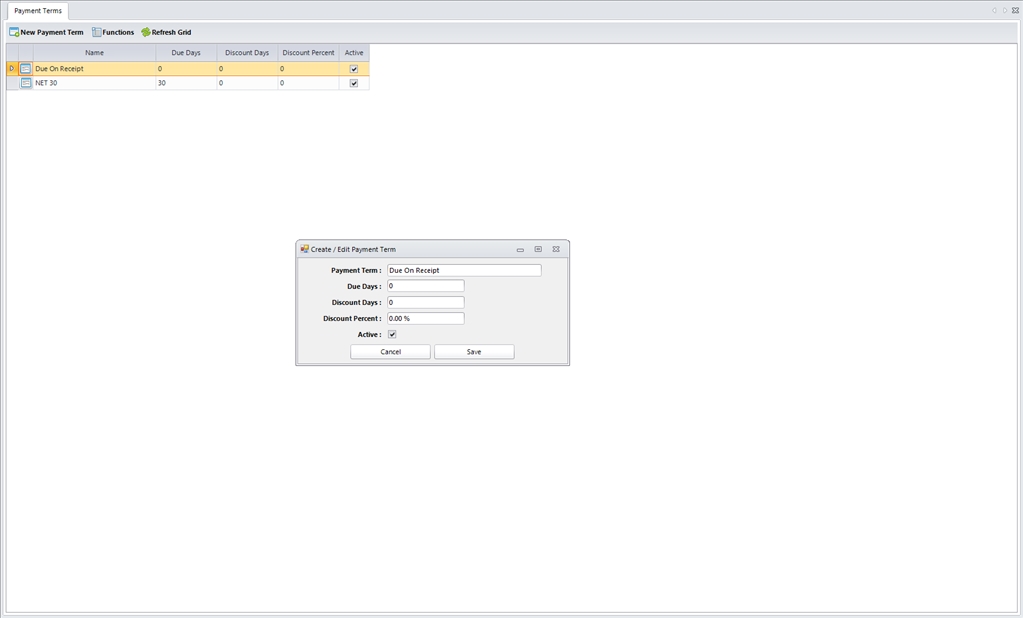
Payment terms can be created two different ways. The first way is to manually create them by clicking on the New Payment Term button. This will bring up a form allowing the user to enter information about the payment term. First enter a descriptive name for your payment term. This name will show on your invoice. Examples would be NET30 or Due On Receipt. Next enter the number of days for invoice to be due. In the case of NET30 enter 30 for Due Days. The next fields can be used if you offer discounts for early payment. The first field Discount Days is the max number of days discount will apply. If you offer a discount if paid by 15 days then enter 15 in the Discount Days field. If you are using discounts you will need to enter the discount percent in the Discount Percent field. Finally if you want the payment term to be active make sure the Active field is checked. Payment terms not marked as active will not show up in the payment term drop down list.
The second way to create payment term is through the import document located at http://www.osmpro.com/setup.html. Once the document has been completed please e-mail the completed packet to support@trinetica.com.
To view or update information about a payment term click on the ![]() button. This will bring up the Payment Term Editor.
button. This will bring up the Payment Term Editor.
Tax Codes
The Tax Codes screen allows you to view and configure the A/R tax codes for your organization. Tax Codes must be configured to allow loads to be automatically taxed. If your organization is not paying sales tax the tax codes are optional.

Tax codes can be created two different ways. The first way is to manually create them by clicking on the New Tax Code button. This will bring up a form allowing the user to enter information about the tax code. All fields on the Tax Code Editor are required. First enter the name of the tax code. This name should reflect the local tax code name. Next select the Country, State, and County that this tax code will be applied to. Next enter the tax amount in the Tax Rate field. The Active Date and End Date will drive the availability of the tax code. If there is no Active Date the tax code will not be used. If there is an Active Date with no End Date the tax code will be used as long as the loads trip start is after the Active Date. If a tax code has both an Active Date and an End Date, the trip start of the load must fall between these date ranges.
The second way to create tax codes is through the import document located at http://www.osmpro.com/setup.html. Once the document has been completed please e-mail the completed packet to support@trinetica.com.
To view or update information about a tax code click on the ![]() button. This will bring up the Tax Code Editor.
button. This will bring up the Tax Code Editor.
If changes need to be made to the tax code table, normally happens when a county changes the sales tax amount. Set the End Date for the current tax code to the day the new rate becomes active and create a new tax code and set the Active Date to be the day when the new tax code is active. Modifying existing tax codes rates may cause unexpected results during Invoicing and Invoice Regeneration.
Invoice Rules
Invoice rules are created by Trinetica and built into the business logic of OSM Pro. If you are needing a custom invoice rule for your organization, or for a broker that you carry for please contact Trinetica to have a new invoice rule created. Please note that invoice rules tie directly into the OSM Pro engine and will be available to all carriers. Before using an invoice rule please read below about features of each invoice rule that is in OSM Pro. If you are unsure about which invoice rule to use when configuring Customer Rates, please contact your sales representative at Trinetica.
Default Hourly Invoice Rule
The default hourly invoice rule for OSM Pro is to list all loads by carrier. These loads have no grouping. Invoice details contains all jobs that are marked for invoice the broker. The detail line contains the following information.
Default Qty. Invoice Rule
The default quantity invoice rule for OSM Pro is to list all loads by carrier. These loads have no grouping. Invoice details contains all jobs that are marked for invoice the broker. The detail line contains the following information.
SWN Invoice Rule
The SWN invoice rule is for carriers doing loads for South Western Energy. OSM Pro has prebuilt rules for grouping and layout of invoices based on South Western Energy specifications.